
May 23, 2024
Starting Aug. 21, 2024, Golden West will require SMTP authentication be enabled through a setting in your email client in order to send email. This requirement will help maintain a secure connection and protect our members online.
Authenticating outgoing email involves updating the settings in your email client. The vast majority of customers already use the appropriate setting. If you received notice that your email address currently sends email without authentication, or if you want to be sure that you are, review the instructions below the email client or device that you use.
EMAIL CLIENT TYPE:
- Microsoft Outlook
- Mozilla Thunderbird
- Mac Mail
- Windows Live Mail
- Windows 10 & 11 Live Mail
- iPhone or iPad
- Android
If you use Microsoft Outlook:
-
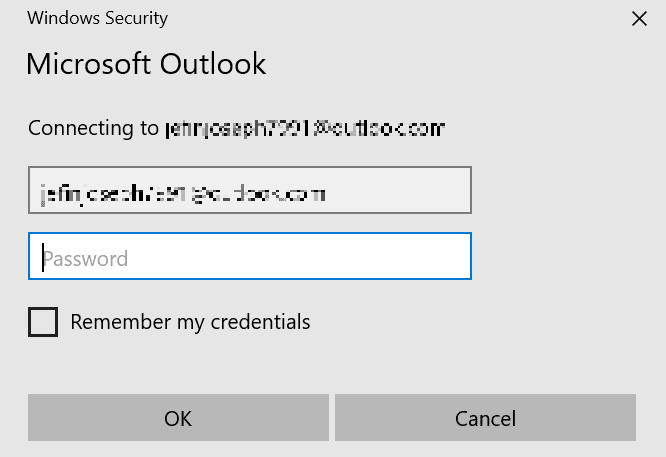
Launch the Outlook desktop mail app, and sign in with your username and app password.
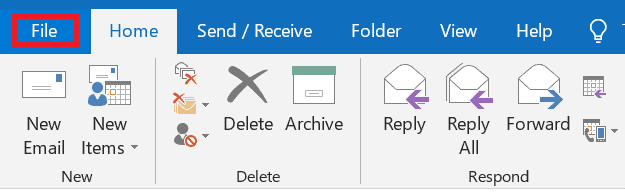
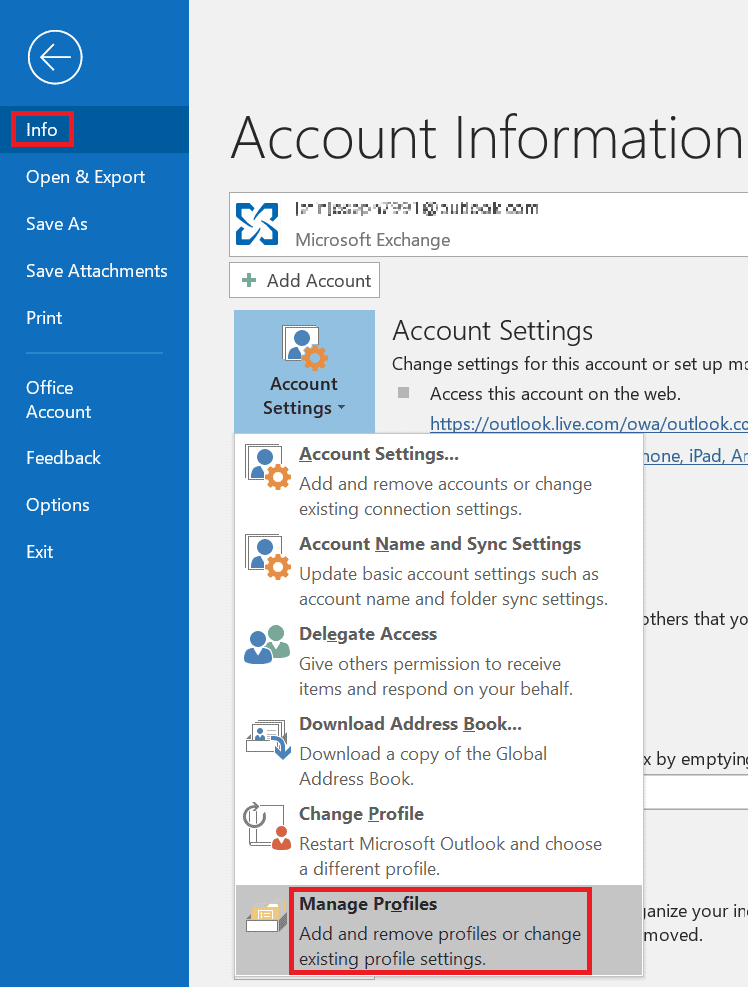
- Click on the File menu, then select Info and click on Account Settings.
-
From the Account Settings dropdown menu, select Manage Profiles, and a Mail Setup window will appear.
-
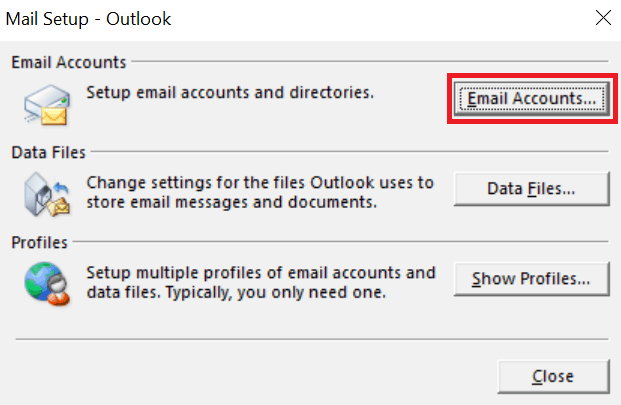
Next, click on the Email Accounts button within the Mail Setup window.
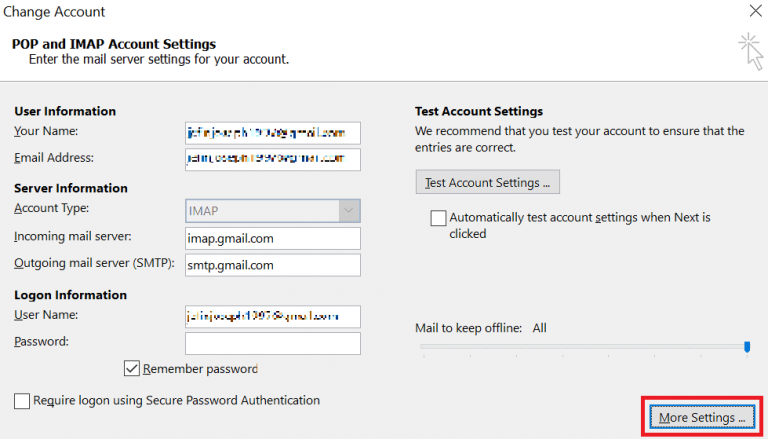
- Select your e mail account and click Change.

- In the Change Account window that appears, click on More Settings.

- From the Internet Email Settings window, select the Outgoing Server tab.
- Under the Outgoing Server tab, tick the checkbox that says “My outgoing server (SMTP) requires authentication” and click the Log on using radio button.
Insert the username (the email address from which you send the email) and password into their respective fields. Moreover, ensure that the “Require Secure Password Authentication” box is unchecked.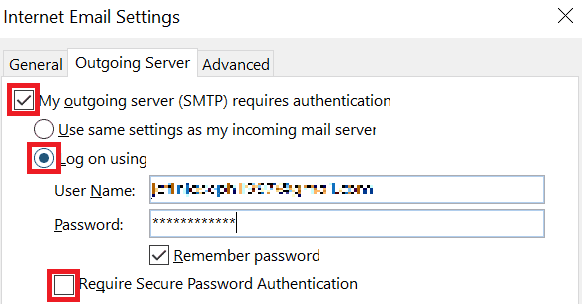
- Next, click on the Advanced tab.
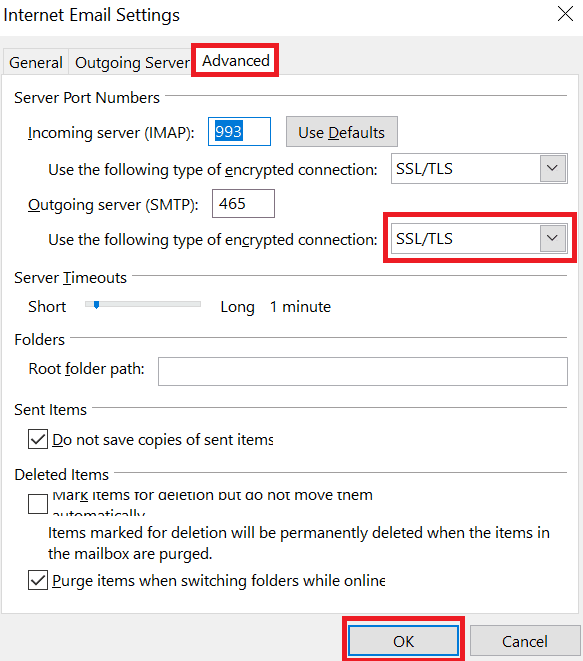
- In the Advanced tab, choose the SSL/TSL encrypted connection from under the “Use the following type of encrypted connection” dropdown list and click OK.
If you use Mozilla Thunderbird:
-
Open Mozilla Thunderbird, then click on the

-
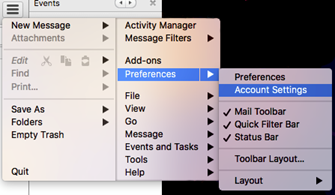
In the Thunderbird menu, go to Preferences and then click on Account Settings. This will open all the email account settings.
-
Click on Outgoing Server (SMTP) in the left navigation menu. Then click on the mailserver used by your affected email address and click Edit....
- In the Security and Authentication section, make sure the Authentication method is set to Normal password. This will use your email password to authenticate SMTP.
- Click OK to save your settings and then OK again to return to your mailbox.
- Open Mail, click on the Mail menu, and then choose Preferences.
- Click on Accounts and then choose the email account that won't send email from the left navigation menu.
-
Make a note of the Outgoing Mail Server (SMTP) setting (you'll need it soon).
-
Click the dropdown menu for Outgoing Mail Server (SMTP) and then select Edit SMTP Server List...
-
Click on the server name that matches the outgoing mail server you saw in step 3. You'll see the server information populate in the bottom half of the settings window. Above the server information, click on the Advanced tab.
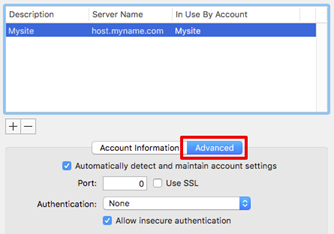
-
In the Authentication dropdown menu, set the authentication method to Password. Underneath the Authentication field, click the check box to turn on Allow insecure authentication. (This doesn't make your mail insecure, but it allows you to send email if you haven't purchased an SSL certificate).
- Click OK to save your mailserver settings and close out of the Accounts window.
- Right click on the Account (above your "Inbox") and select Properties.
- Select the Servers tab.
- Check "My server requires authentication" and click Settings.
- Ensure "Use same settings as my incoming mail server" is selected.
- Ensure "Log on using Secure Password Authentication" is not selected.
- Click OK.
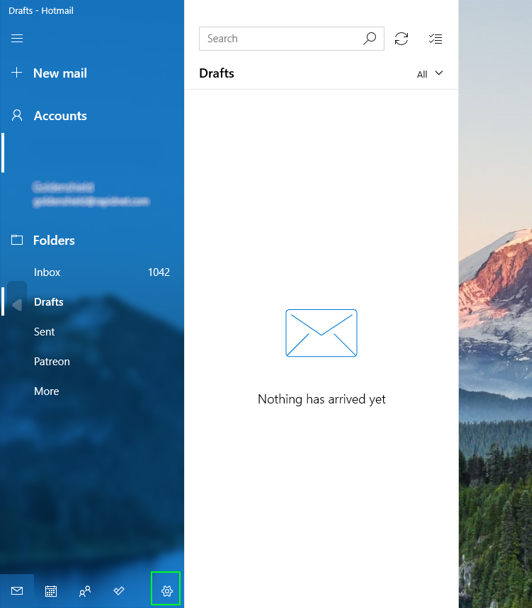
If you use Windows 10 or 11 Live Mail:
- Go to the gear icon

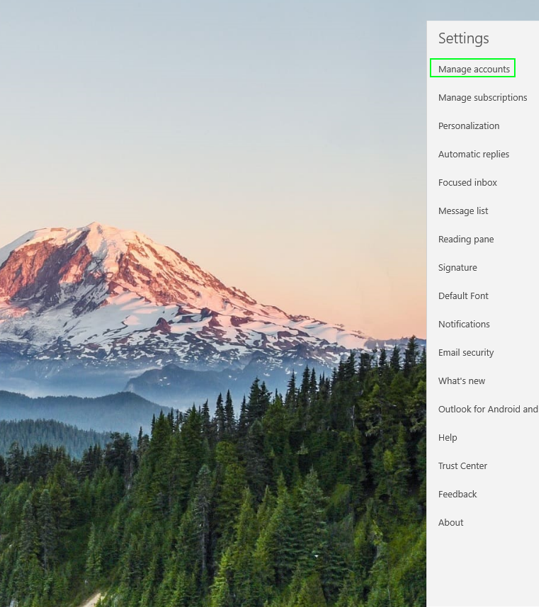
- Select the email account on the right, and change mailbox sync settings on the account settings window that comes up.
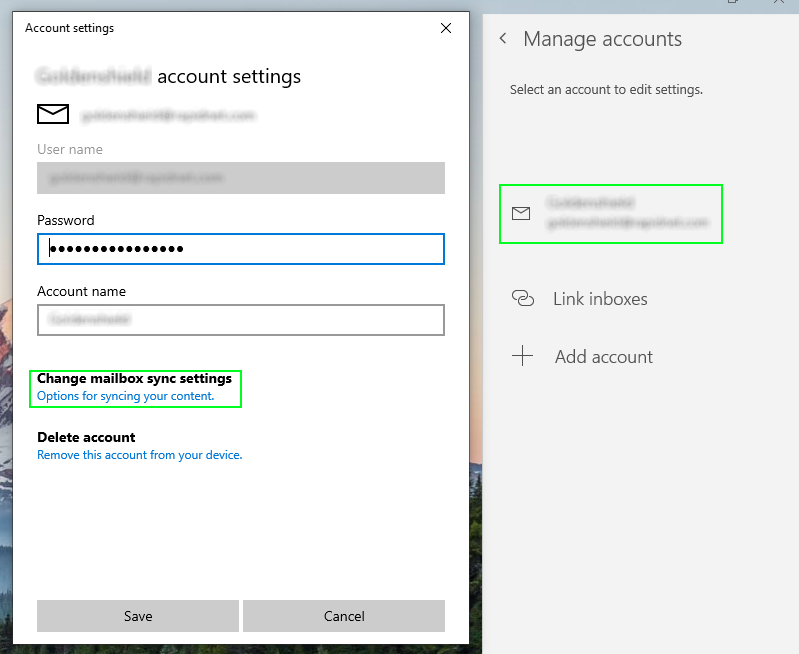
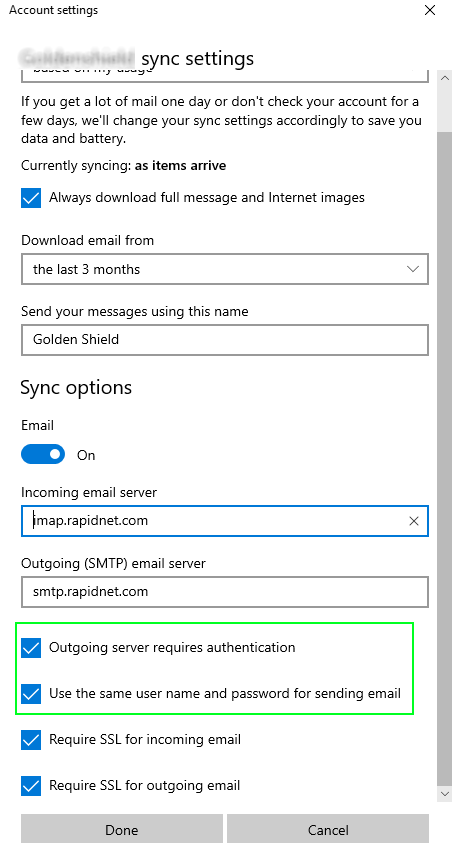
- Click on advanced mailbox settings.
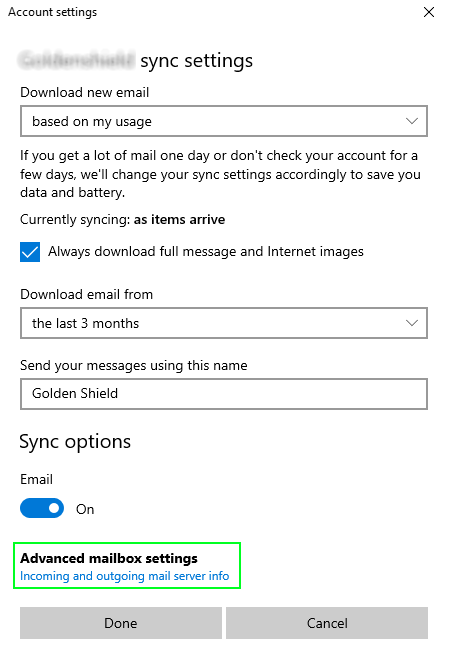
- Scroll down (there will be more options under where advanced mailbox settings is), and make sure Outgoing server requires authentication is enabled, and Use the same user name and password for sending email is enabled as well.
- Open the Settings app on your phone. Tap on Mail, Contacts, Calendars and then tap on the account that won't allow you to send mail.
- Scroll down to Outgoing Mail Server and tap SMTP.
- Tap the server listed under Primary Server to open your mailserver settings.
- Tap on Authentication and make sure the authentication method is set to Password.
- To save your settings, tap Back, then Done, and then Save.
- Open the Email app on your Android device.
- Tap More and then tap Settings.
- Tap the email address that isn't able to send email to open the specific account settings.
- Scroll all the way down to Advanced settings and tap on Server settings.
- Within the Server settings, scroll down to Outgoing server and make sure the box for Authentication required before sending emails is checked.
- Save your settings by tapping Done.